


7 Steps to Effective Problem Solving
Matri will do everything possible to identify and resolve any problems that occur with your machine, within the warranty period. But it is not always necessary to send back your machine to be repaired. Very often you can solve most problems yourself, and of course, it is much more interesting to be able to continue your work, then to send back your machine !
We have made a summary with a few steps to follow, to help you solve the most common problems.
Please follow all the steps, as even I, as an experienced sewist and teacher, sometimes make mistakes . I go back and make sure to follow all the steps and in most cases, my machine works perfectly fine afterwards!
- Take off bobbin thread and upper thread.
- Push the bobbinwinder in sewing position.
- Put in a new needle.
- Use a good quality thread as both lower and upper thread, always use the same quality thread as lower and upper thread.
- Thread the machine with presser foot up.
- Use a newly wind bobbin, put in correctly in the machine.
- Sew a test piece.
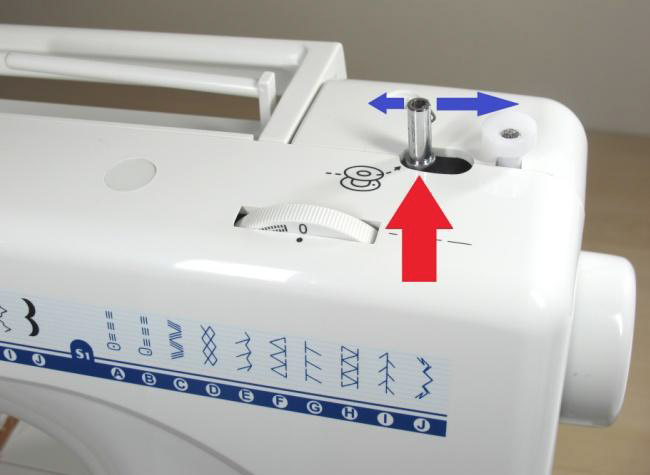
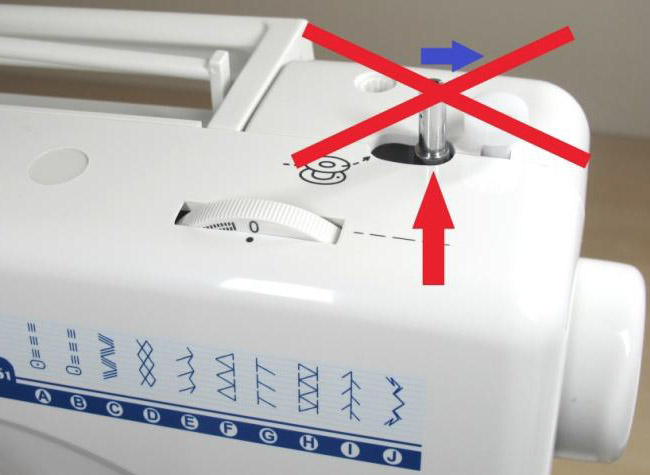
2. Check that the machine is not in the bobbin winding position.
Push the bobbinwinder in the sewing position.
The bobbinwinder should be in the LEFT position, which is the sewing position. Move the bobbinwinder a few times to the left and right to make sure the machine « takes » the right position. Stop with the bobbinwinder in the left position. Use the foot pedal to test. (the bobbinwinder is not turning, the needle goes up and down.
3. Put in a new needle
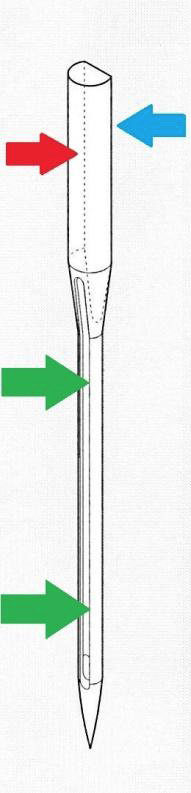 The needle has a curved side (red arrow) and a flat side (blue arrow ). The flat side of the needle is the back side. On the front side of the needle, near the tip you can see a groove ( green arrow ). This is the front of the needle.
Undo the needle holder screw so you can put the new needle in, as high as possible. Screw tightly so the needle is well kept in the needle holder.
5. Threading the upper thread.
Thread according the diagram, make sure the presser foot is in the upper position.
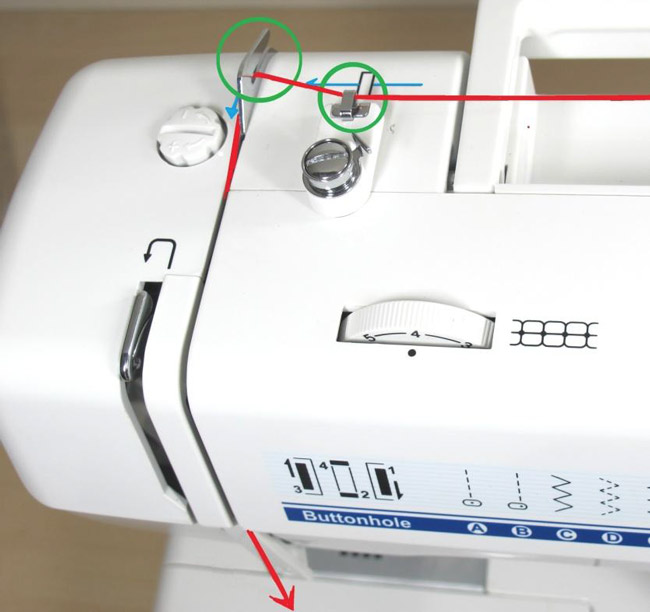
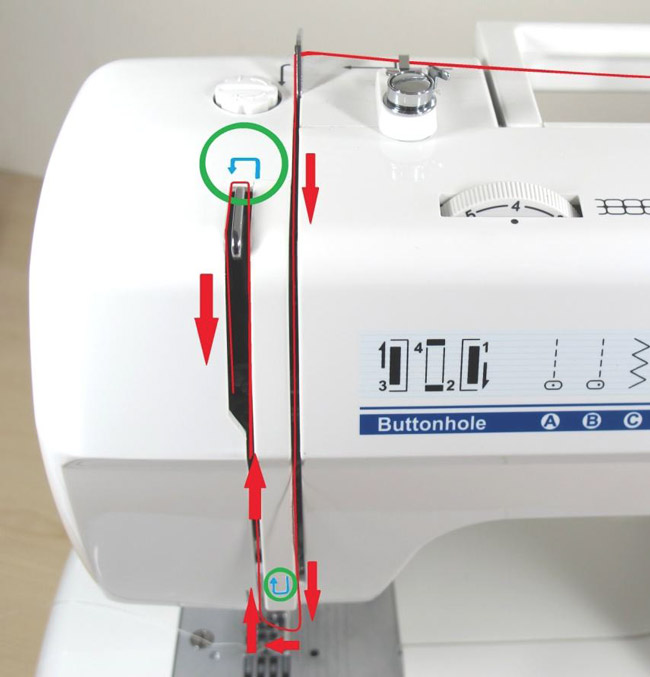
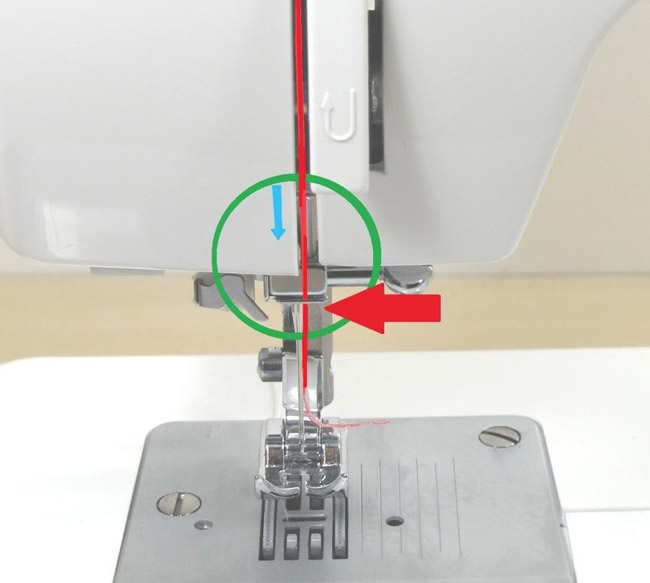
Just after having put the thread behind the hook, just before threading the needle, lower the pressure foot.

Try and pull the thread, you should feel a resistance. If you don't feel a resistance, the thread is not well put between the tension disks.
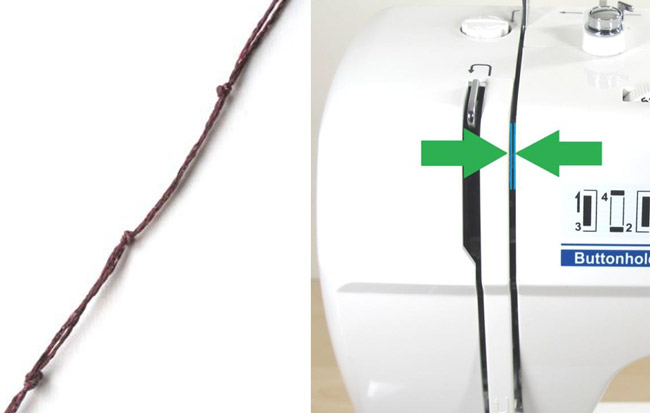
Sometimes dust and rests of thread can stay between the tension disks. You can clean this part of the machine with a few pieces of sewing thread tied together, cleaning the same way you clean between your teeth.
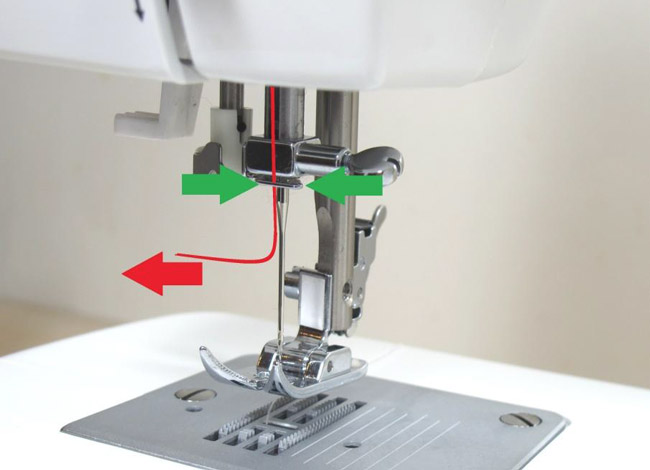
Rethread the machine again. Pull the thread to test the tension. If all is well, thread the needle.
6. Putting a new bobbin in the machine
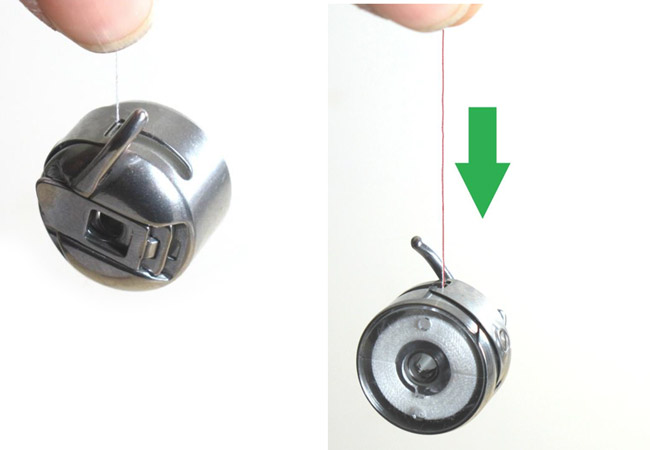
A (Vertical bobbin case): put the bobbin in the bobbin case. Pull the thread through the slot while keeping the bobbin in place. Pull the thread and you can see the bobbin turning clockwise.


You can test the tension by hanging bobbin and bobbin case, keeping the thread between your fingers. Move your hand up and down slowly the bobbin and bobbin case should drop about 1 cm.
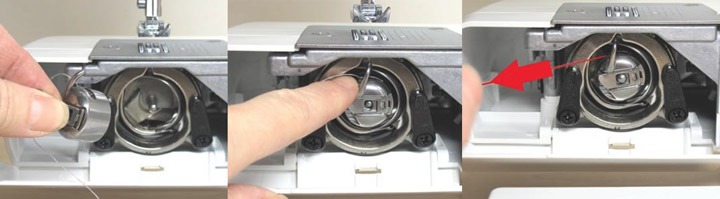
If the tension is ok, you can put bobbin and bobbin case in the machine with the « finger » up. Open the little cover on the bobbincase to be able to put the bobbincase in the machine. Close the cover. Pull the thread, the bobbin case should stay in the machine and not turn.
B (horizontal bobbin case): put the bobbin correctly in the machine.
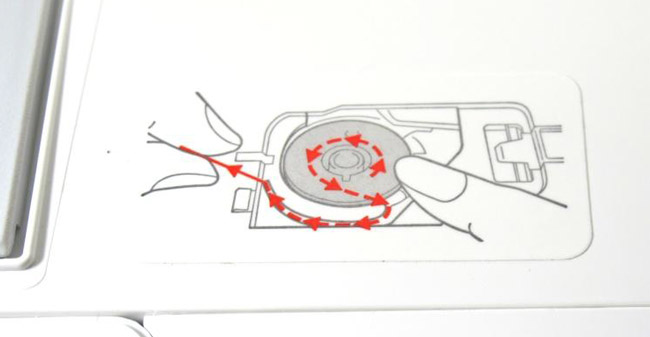
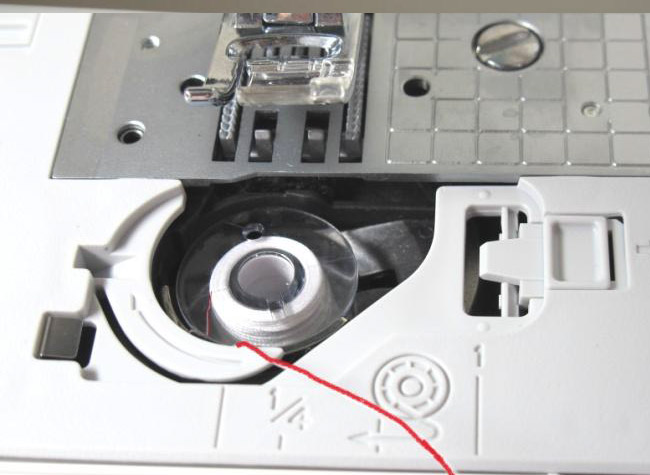
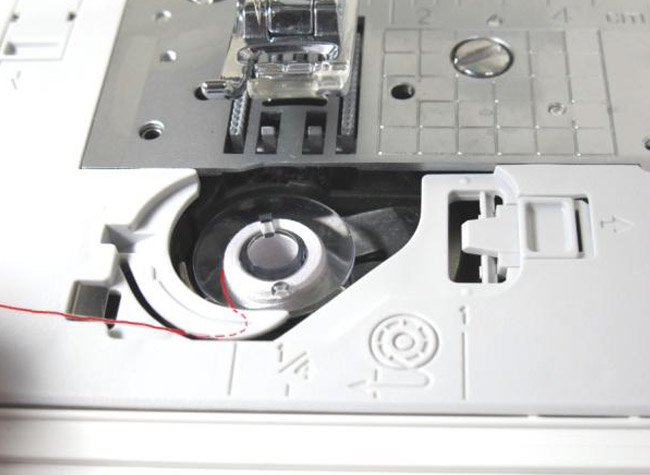
Pull the thread through the groove while keeping the bobbin in place. The bobbin thread follows a path with a tension system. If you pull the thread, the bobbin should stay in place, even if the cover has not been put in place. The bobbin turns. Rethread if the bobbin is not staying in place.
7. Sew a testpiece
Use a cotton fabric, not too thick, not too thin (jeans fabric is too thick, lining fabric is too thin).
Fold the fabric to double and sew a few straight stitches, following by zigzag stitches on the largest setting possible.
Good luck and know that if you still have problems after these steps, you can contact Matri so we can give you all the help you need.
ADVICE: Performing periodic maintenance on your sewing machine is particularly important.
A well-maintained machine will likely run better and prevent annoying, time consuming, and costly problems later.
It is certainly advisable to give your machine regular maintenance.
You can easily do this yourself with our free maintenance tips
View our maintenance films here!
Order your maintenance kit here including needles, oil, brush, screwdriver, etc.